Using Amazon Bedrock API to Generate Images with Amazon Nova Canvas
In this section, we will explore how to use the Amazon Bedrock API to generate images using Amazon Nova Canvas. We’ll complete three coding exercises to build image generation applications with the help of Amazon Q Developer.
Introduction to Amazon Nova
Amazon Nova is the next generation of advanced foundation models (FMs) that offer cutting-edge intelligence and industry-leading price-performance, exclusively available on Amazon Bedrock.
You can use Amazon Nova to reduce cost and latency for nearly any generative AI task. It supports complex document and video analysis, diagram understanding, compelling video content creation, and sophisticated AI agents optimized for enterprise workloads.
Whether you’re developing document-processing applications that handle text and images, generating marketing content at scale, or building AI assistants that can understand and process visual information, Amazon Nova delivers the intelligence and flexibility you need through two model types:
- Understanding Models: Accept text, image, or video input and generate text output.
- Creative Generation Models: Accept text and/or image input and generate image or video output.
Amazon Nova Canvas
Amazon Nova Canvas is a modern image-generation model that creates professional images from user-provided text or images. It also includes easy-to-use tools for image editing through text instructions, as well as controls to adjust color schemes and layouts.
This model includes built-in safety features for responsible AI usage, such as watermarking and content moderation.
Exercise 1: Build a Text-to-Image App
We will begin by creating a Streamlit app that generates images from user prompts and predefined styles. Streamlit allows you to easily build interactive web apps in Python.
Goal
Build an app that allows users to:
- Select a model.
- Enter a prompt to send to Amazon Bedrock.
- Display the generated image.
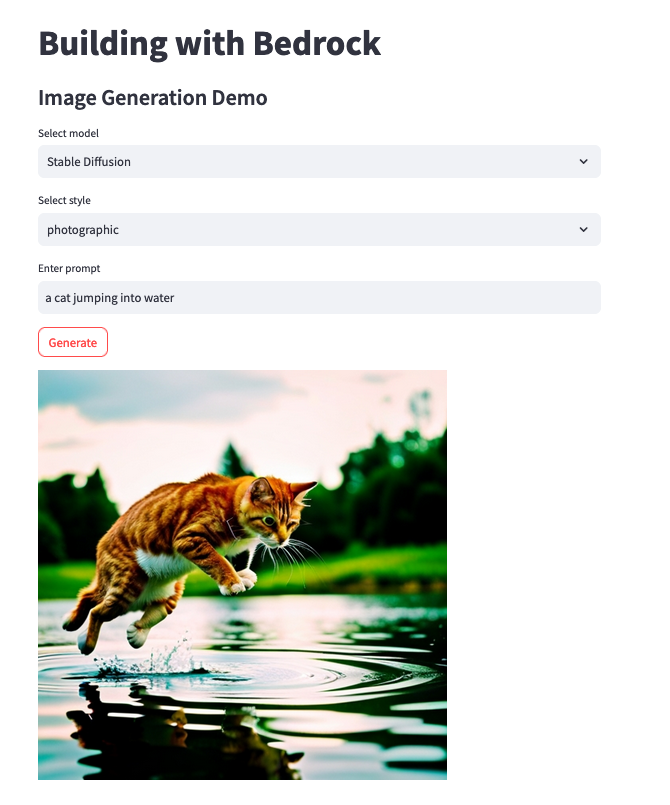
The final app will look like this: Gen Image App
Getting Started
In your Visual Studio Code IDE, open the file:image_examples/image_gen_st.py
This file contains code for calling different models but is missing the interactive UI components. This is where Amazon Q Developer can help turn our ideas into executable code.
Amazon Q Developer - Writing Code
Since we already know the intended functionality of the app, ask Amazon Q to update the application with the following:
Can you add the following to my application:

1. A text input box to capture user prompts.
2. A standalone function that can turn a base64 string into an image.
3. A button to call `generate_image_nova`
4. The image return will be a base64 string; use the standalone function to convert it to an image that can be displayed in Streamlit.
Amazon Q Developer will process the request and provide updated code for the file.
Amazon Q Developer - Understanding Code
To understand code functionality:
- Highlight the code.
- Right-click and select: Send to Amazon Q → Explain.
Q Developer will return a detailed explanation of the code.

Run Your Code
To test your script:
- Run it from the terminal:
streamlit run image_examples/image_gen_st.py
Click Open in Browser (or use the external URL).
If successful, you will see the application. Now create the image by entering the prompt, for example then click on the Button
a cat jumping into water
- If errors occur, return to the IDE and use Amazon Q Developer to debug.
The complete code is available at: full_code/image_gen_st_full.py
Next Steps
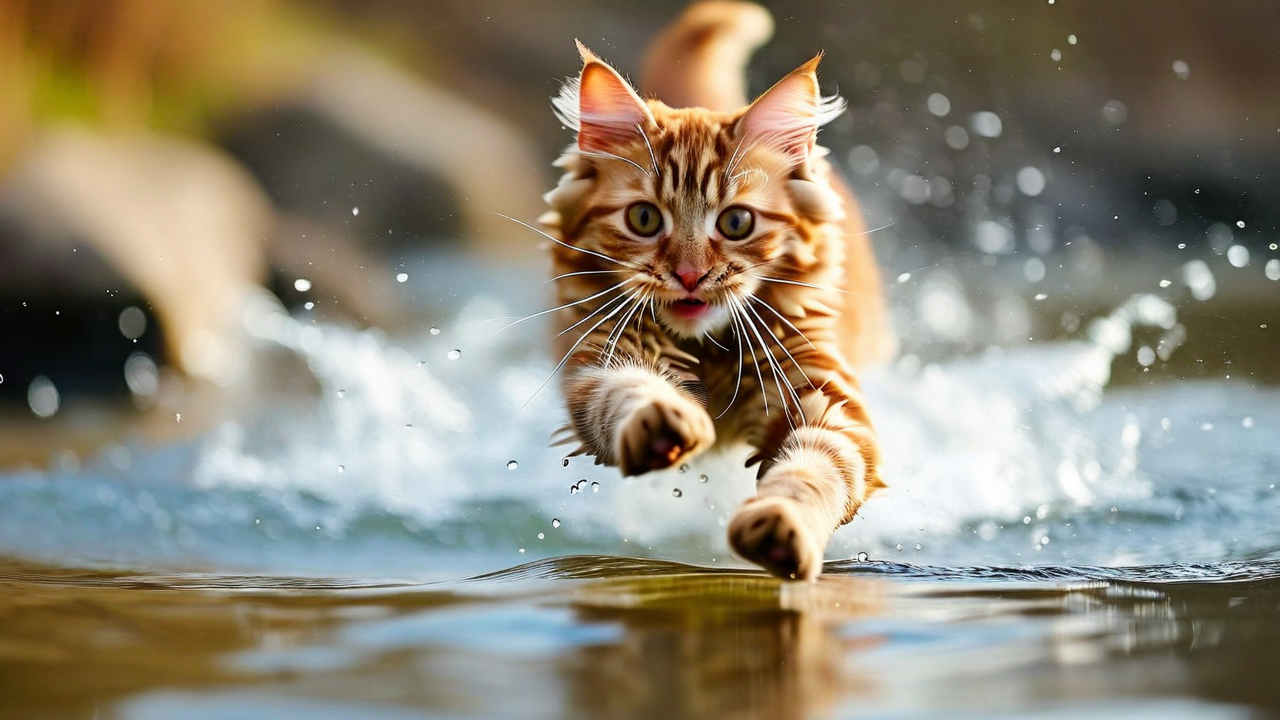
For the next exercise, we will edit images using a prompt.
You can save one of the images you’ve created or use the image below for practice.
Exercise 2: Build an Image-to-Image App
In this exercise, we will build an app that can update an image based on a user prompt.
️ First, open the file:
image_examples/image_to_image_st.py
This file already has some code to do image-to-image generation, but it’s missing some interactive components to make it fully functional.
This is where we can take advantage of inline code suggestions image_to_image_st.py from Amazon Q Developer to generate the necessary code.
Tasks to Complete
In image_to_image_st.py, your task is to add comments at # TODO insert your comments (line 148) that will help generate the following functionality:
Add a file uploader to upload an imageGet a user prompt to modify the image
How to Use Inline Code Suggestions
- On Mac: press
Option + C - On Windows: press
Alt + C
Need help? Try suggestions like those above.
Full reference code available at:
full_code/image_to_image_st_full.py
Run Your Code
When you’re ready to test, run this command in your Terminal:
streamlit run image_examples/image_to_image_st.py
Stop it any time using CTRL + C
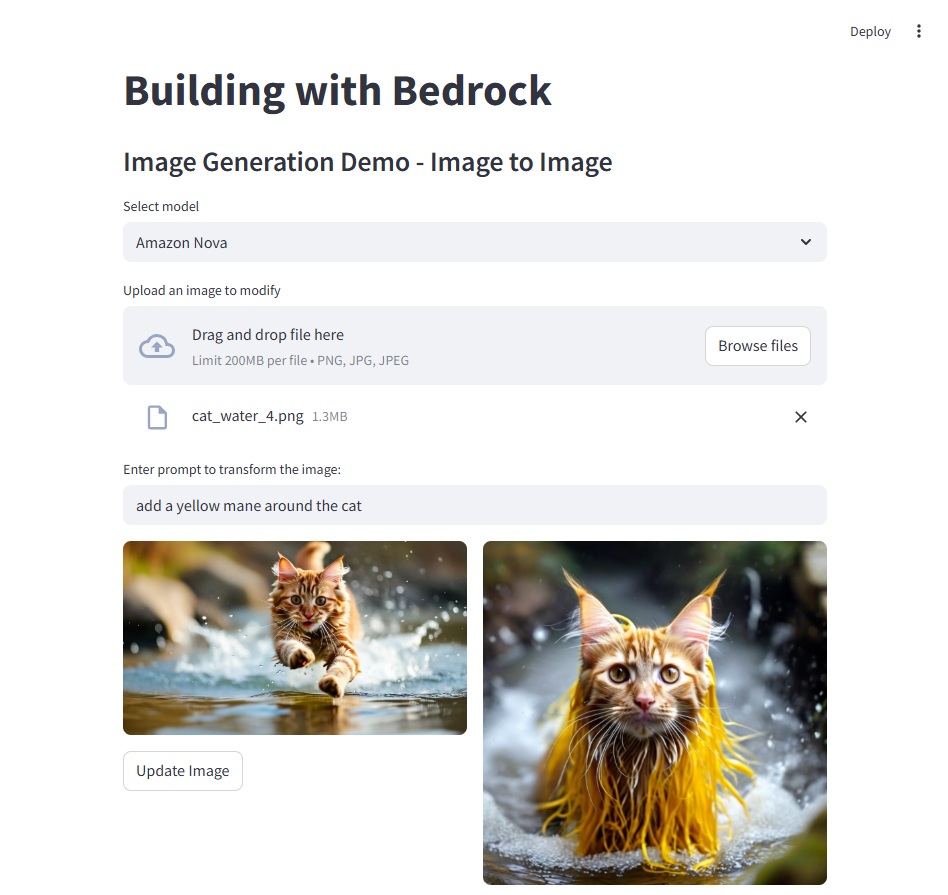
Example prompt for a cat image
add a yellow mane to the cat
Make sure to click the button you created. Try experimenting with different prompts!
In the next exercise, we’ll explore more advanced ways to edit images.
Exercise 3: Build an Image Understanding App
In this part, we’ll explore how to use Claude 3.5 Sonnet, Anthropic’s multimodal AI model, to:
- ️ Input an image
- Receive a detailed text description of the image
We’ll also explore how to use the /dev feature from Amazon Q Developer to add new functionality.
Tasks to Complete
️ Open the file:
image_examples/image_understanding_st.py
This file is missing a few interactive components. You need to:
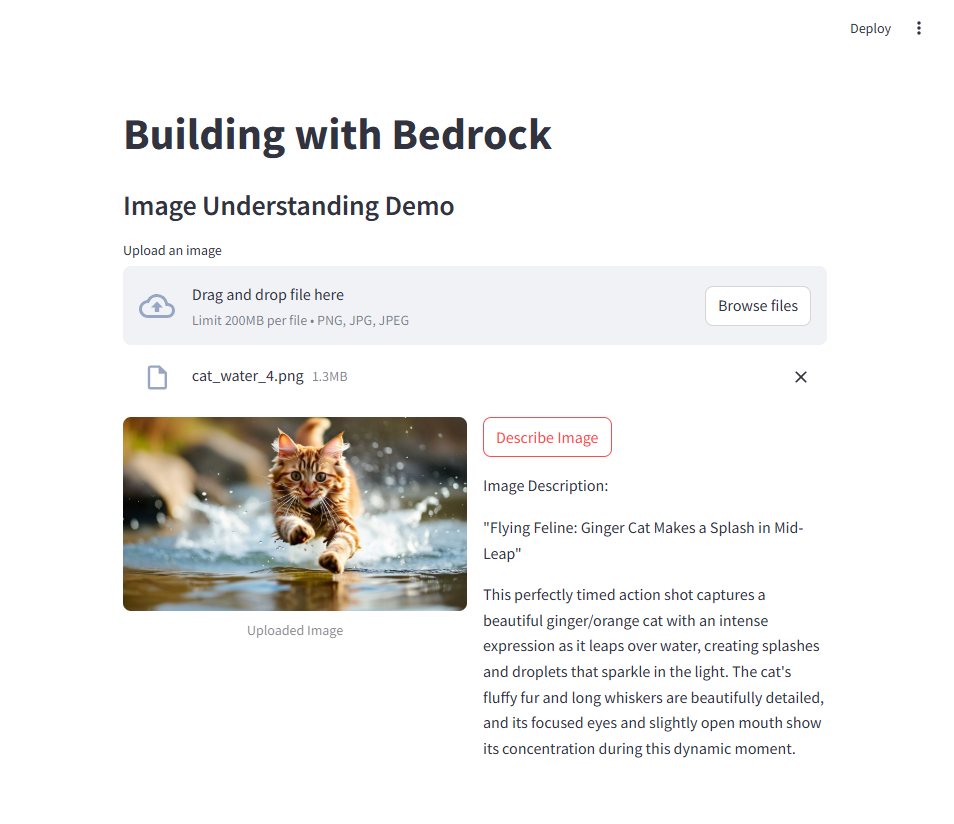
- Display the image in column 1
- Add a button to describe the image using Claude Sonnet
Use /dev in Amazon Q Developer
In the Amazon Q Developer chat window, type:
/dev
Once /dev is bolded, request:
Can you update image_understanding_st.py to show the image in column 1, and then add a button to describe the image.
Amazon Q Developer will:
- Create a feature plan
- Show you the proposed changes
- ️ Let you click Generate code
- Allow you to review and then click Insert code
Full reference code available at:
full_code/image_understanding_st_full.py
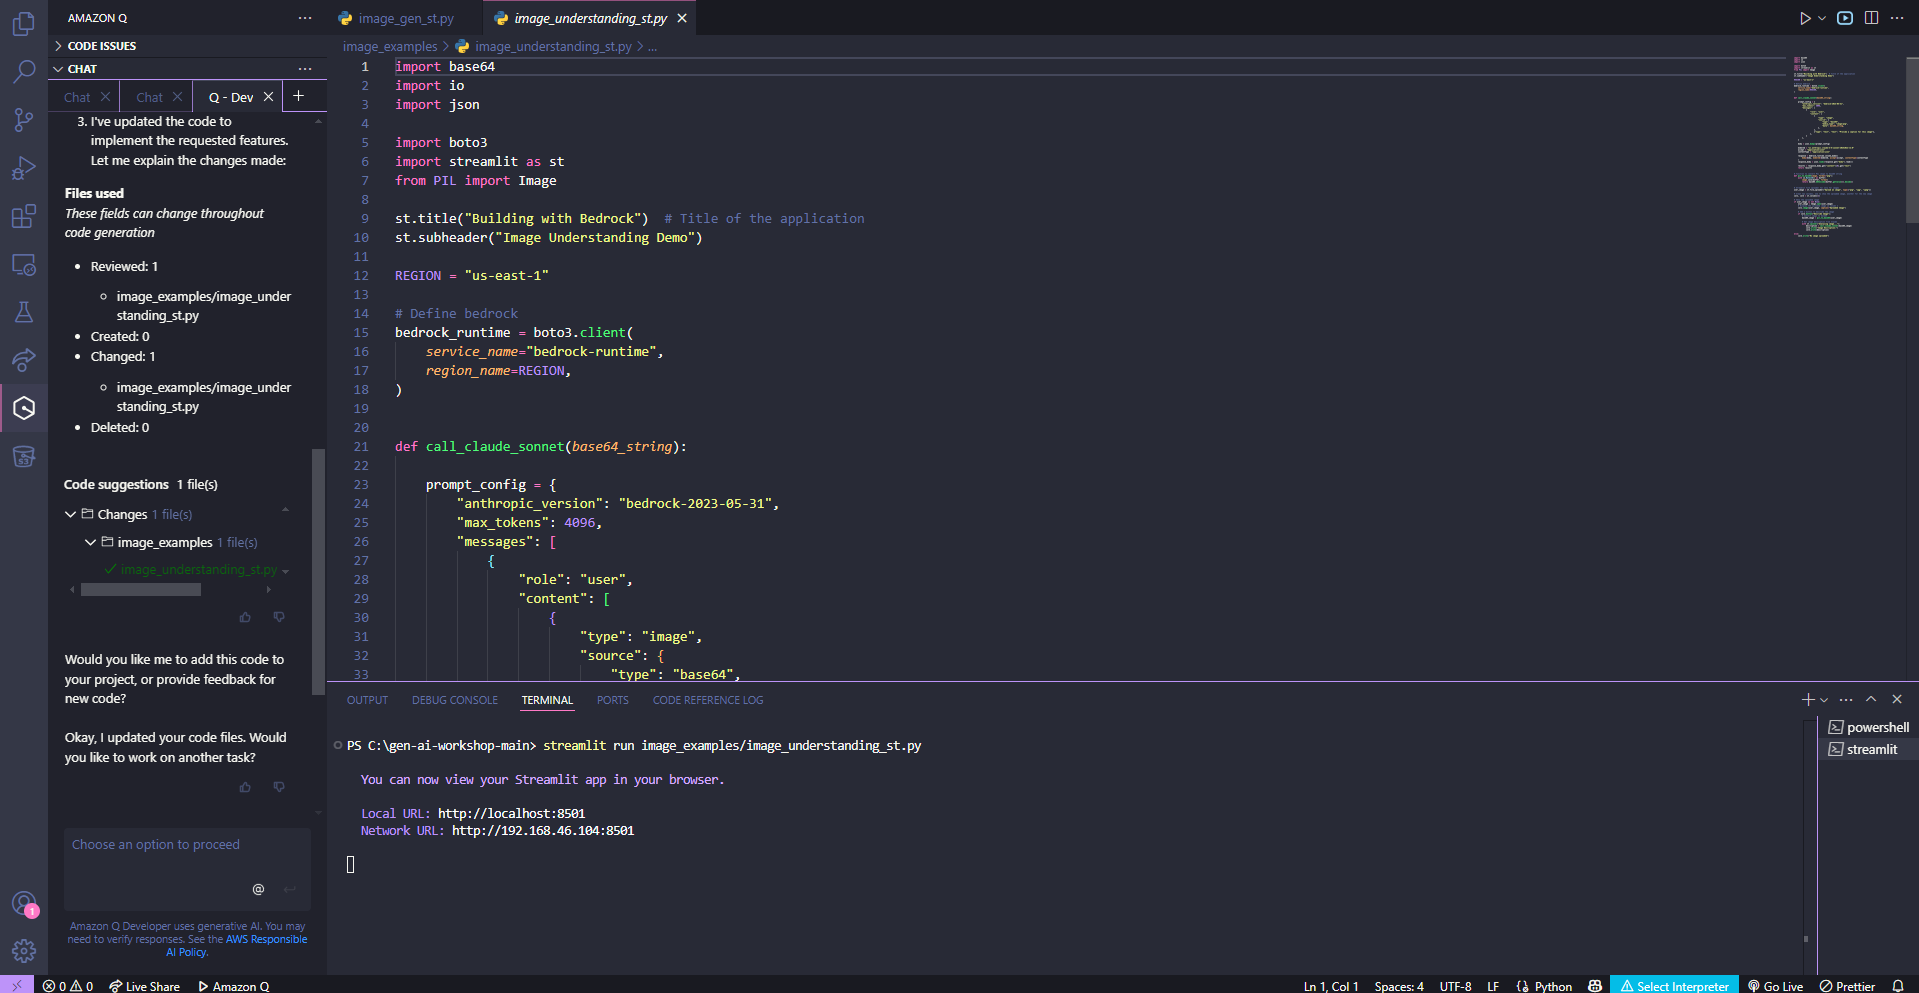
Run Your Code
In Terminal, run:
streamlit run image_examples/image_understanding_st.py
Stop with CTRL + C
Click the button you created and try with different images!
Wrap-Up
Now you know how to use Amazon Bedrock to generate and edit images.
Next, we’ll explore how to use this tool for text generation tasks!